Showing posts with label butterflies. Show all posts

Tuesday, August 02, 2011

Where a kid can be a kid....

I've been home for almost 5 days now - on a much needed break from school. The house is finally clean - the laundry room which has been about half-way painted with 3 different shades of the wrong color - is finally painted. Now the cabinets need to be painted b/c they suddenly look a bit shabby next to the freshly painted walls. I've decluttered a bit (there's stilla  LONG way to go) baby steps!  It felt so good to donate about 3 trash bags full of items that we weren't using though!

I took a few pictures of my kiddo's rooms - parts I like about them - to be able to show them someday when they are grown. When I was young, I had a magical room. My (uber-artistic) mom painted a sky scape in my bedroom. My walls and ceiling were adorned with beautiful clouds and a huge pegasus that my dad won me at a local fair was flying in the corner (suspended by clear fishing line).  My bedspread was sky blue with rainbow ruffles for trim, and my window had a similar curtain. I loved spending time there. I only wish I had pictures of it, because as it's described, I know it sounds corny - but I promise, it was nothing short of a wonderland. So many great memories were made there. Hopefully, my kids will have the same memories about the rooms they are growing up in and hopefully these pictures will be able to help job their minds. (They are not the best quality - but they will do).

A happy retreat.  
 Homemade by Nana -  quilt - for wall-hanging, bedskirt and dust ruffle.
 Butterfly lamp and homemade art. Rocking horse heirloom. 
 Batik painting by Auntie Claire.
 Butterfly lamp - handmade by me.
 Simple art by me. 
 Another picture of my Nana's beautiful hand-quilted masterpiece. 
Owl lamp from Target & more made by Nana goodness.
 Cutie patootie hooties. "O" is for Owl antique book page from Aunt Sarah. 
Now onto room two...
Room to grow. 
 Learn for a while.....under the shade of your palm tree. 
 Favorite little friend..dressed and ready to go.
 Art by me....to match the bedding.
More simple art by me.
 Art-line. 
 Bins for storage and a hungry lion for laundry.
 A place to play, and a place to work.
Our favorite place to read as a family. ;)


Friday, May 14, 2010

Fly Away With Me Mobile (Part 2of 3)

Even though I only recently posted the butterfly mobile idea on my blog here, I have actually been working on it since this past winter, in anticipation of my little girl.

After typing up a tutorial, my post was somehow deleted. Much like a sock gets lost in the dryer, my post disappeared from my blog. I was so disappointed that it vanished after putting so much time into it. Has anyone else ever had this happen?  Oh well, so goes life. Enough of my pity party...on with the new tutorial!

I have no idea if this is the "best" method, this is simply the method I used. If you know how to make it easier on yourself or others, please feel free to leave your wisdom in my comments. ;)

I started with a wooden embroidery hoop. I found a spool of metal twine in the bargain bin at Michael's for about .79. It very closely resembles twisty tie line. (Thin gauge wire encased in plastic), but any small wire or possibly even string would probably work. I tied my twine on in pie formation as seen below.

Next I spray painted the whole thing white (wires and all), but I don't have a picture of this step.

I purchased a butterfly punch tool by Martha Stewart, also at Michael's, and created what felt like 100's of butterflies, out of scrapbook paper.

 Then, using a needle and clear fishing line, I createed 2 rows on each line of wire, evenly spaced, one center line and an additional 8 lines on the outer ring, centered between the wires, for a total of 25 strands of butterflies. 
I secured the bottom of each line with a seed bead, both for weight and stability, and tied knots where I wanted the butterflies to "rest" on their lines. So, each butterfly has a knot just below it, holding it in place on its line.
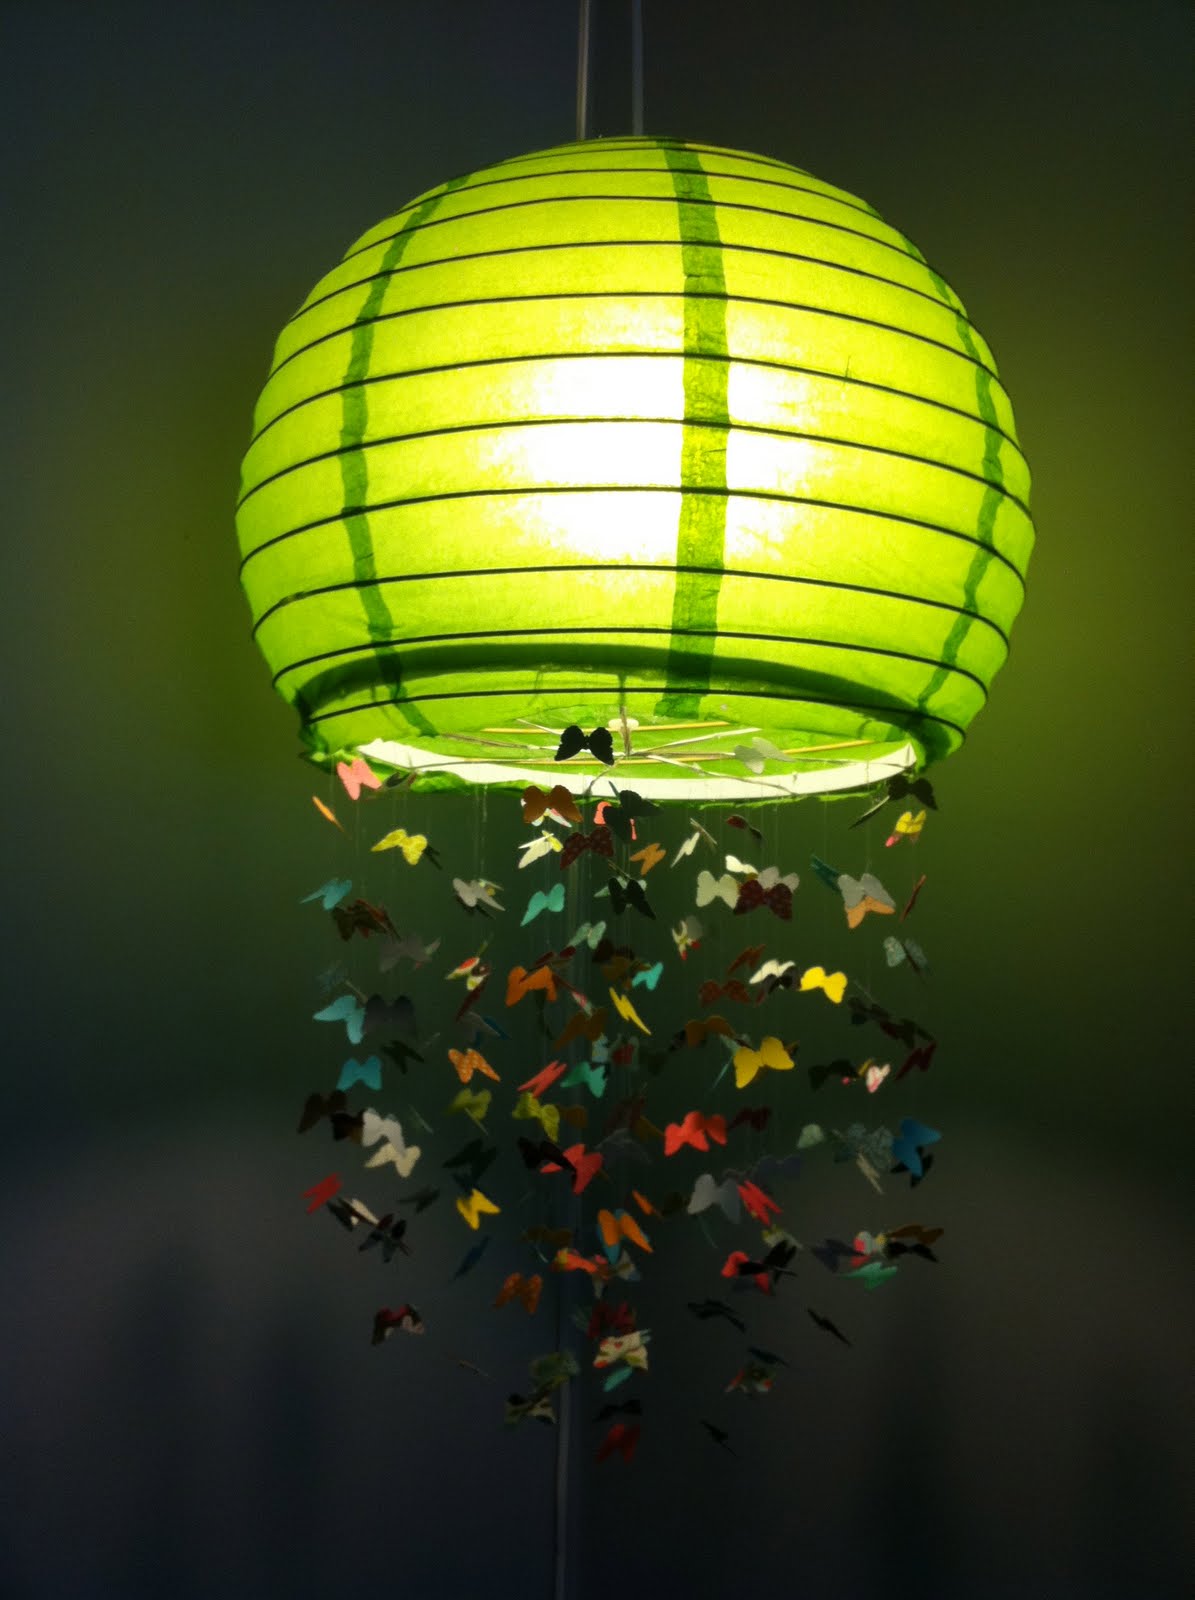
I added one additional butterfly to each row going inward, so the longest row of butterflies, is the center line. Giving it a tiered effect. And, voila! The mobile is complete.  Sorry for the shaky picture, but believe me, the finished result was beautiful! 
 My original plan was to secure this with some decorative ribbon to a hook in the ceiling of my daughter's room. The colors served as the inspiration for the quilt I had my Nana make for her.

When I showed my husband, I held it up under a lamp, and he commented about how it would be  really interesting if I could somehow make it into a lamp. ....I loved the idea, but I will save that for another post!

Tuesday, May 11, 2010

Fly Away With Me Mobile

What I'm working on next........Something similar to this:

I am so excited I can hardly stand it! ;) This mobile is available from PB Kids for $79.00. I am punching out my own colorful butterflies & making my own. I started today, but will post things as I get closer to finishing.

I was even more excited when I saw some recent posts about butterfly projects on Homemade by Jill. Check out her paper punch art project -it's fantastic! Maybe I'll do that next!

Pictures & tutorial coming soon!