
Spring flowers have me in the mood....to create.
My gift for you? A Flower-ruffle Onsie tutorial!


Let me start by saying...I am not a seamstress. This project is not difficult to complete. If you can sew a straight line, then YOU can make this!
I will show you how to make the singed flowers, corsage detail on front and of course, the flower-ruffle bottom on the back.
For another good tutorial on the singed flowers check out Linda's post here for a singed flower knee-high/pantyhose headband at Craftaholics Anonymous. There is a great tutorial for a Ruffle-butt Onsie on U Create, created by Char on Crap I've Made, that you might enjoy, if you like this one.
I'm sharing this post at the following fantastic sites:
Whatever Goes Wednesdays @ Someday Crafts,
Wednesday @Tea Rose Link Party @ Tea Rose Home
Get Your Craft On (Tues)@Today's Creative Blog
Sugar & Spice Girls Link Party (Wed)@ 733
Week-long DIY Link Party (beginning Sun)@Bird Crafts
Wednesday @Tea Rose Link Party @ Tea Rose Home
Get Your Craft On (Tues)@Today's Creative Blog
Sugar & Spice Girls Link Party (Wed)@ 733
Week-long DIY Link Party (beginning Sun)@Bird Crafts
Please use this only for personal use. If you decide to try this yourself - send me a picture of your creation & I'd love to see what you've made. Also, if you do share this tutorial, please let me know & pass on my link!
Thanks! Materials:
Scissors
Ruler/Measuring Tape
Lighter/Candle
Bowl of water
Synthetic Fabric
Beads or buttons
Fabric paint with small tip (or q-tip)
Coordinating Thread
Onesie

Directions:
1. Begin by cutting various sizes of circles out of your synthetic fabric. I got my fabric from the miscellaneous scraps at Hancock's Fabrics for $0.98! You'll want Large, medium and small circles.

2. Light your candle, or grab your lighter. Make sure your bowl of water is nearby. Hold the circle of fabric just outside the flame, so that the fabric is melted slightly around the edges. Approach this as you would if you were roasting marshmallows & BE CAREFUL! You don't actually want to catch the fabric on fire. Using a synthetic material is also important - natural fibers won't singe.

3. Once your petals have all been prepared, arrange concentric circles. I used 1 large, 3 mediums & 3 smalls for the corsage on the front of the onesie and several large & smalls for the bottom ruffle. You can play with the arrangements. Some fabrics look better with more layers. For the corsage ruffles, this is the point where you would place your bead on top, and sew through the bead with your thread doubled. Knot it on the back of the flower and repeat until the bead is securely fastened.


4. Secure the flowers to the front of your onesie by hand following the same technique as above - through the bead. After all flowers are in place, sew through all layers from the wrong side of your onesie out through the flower layers to create anchor points to keep flower from wrinkling up after washing.
Step back & admire your handiwork! Your front is finished.

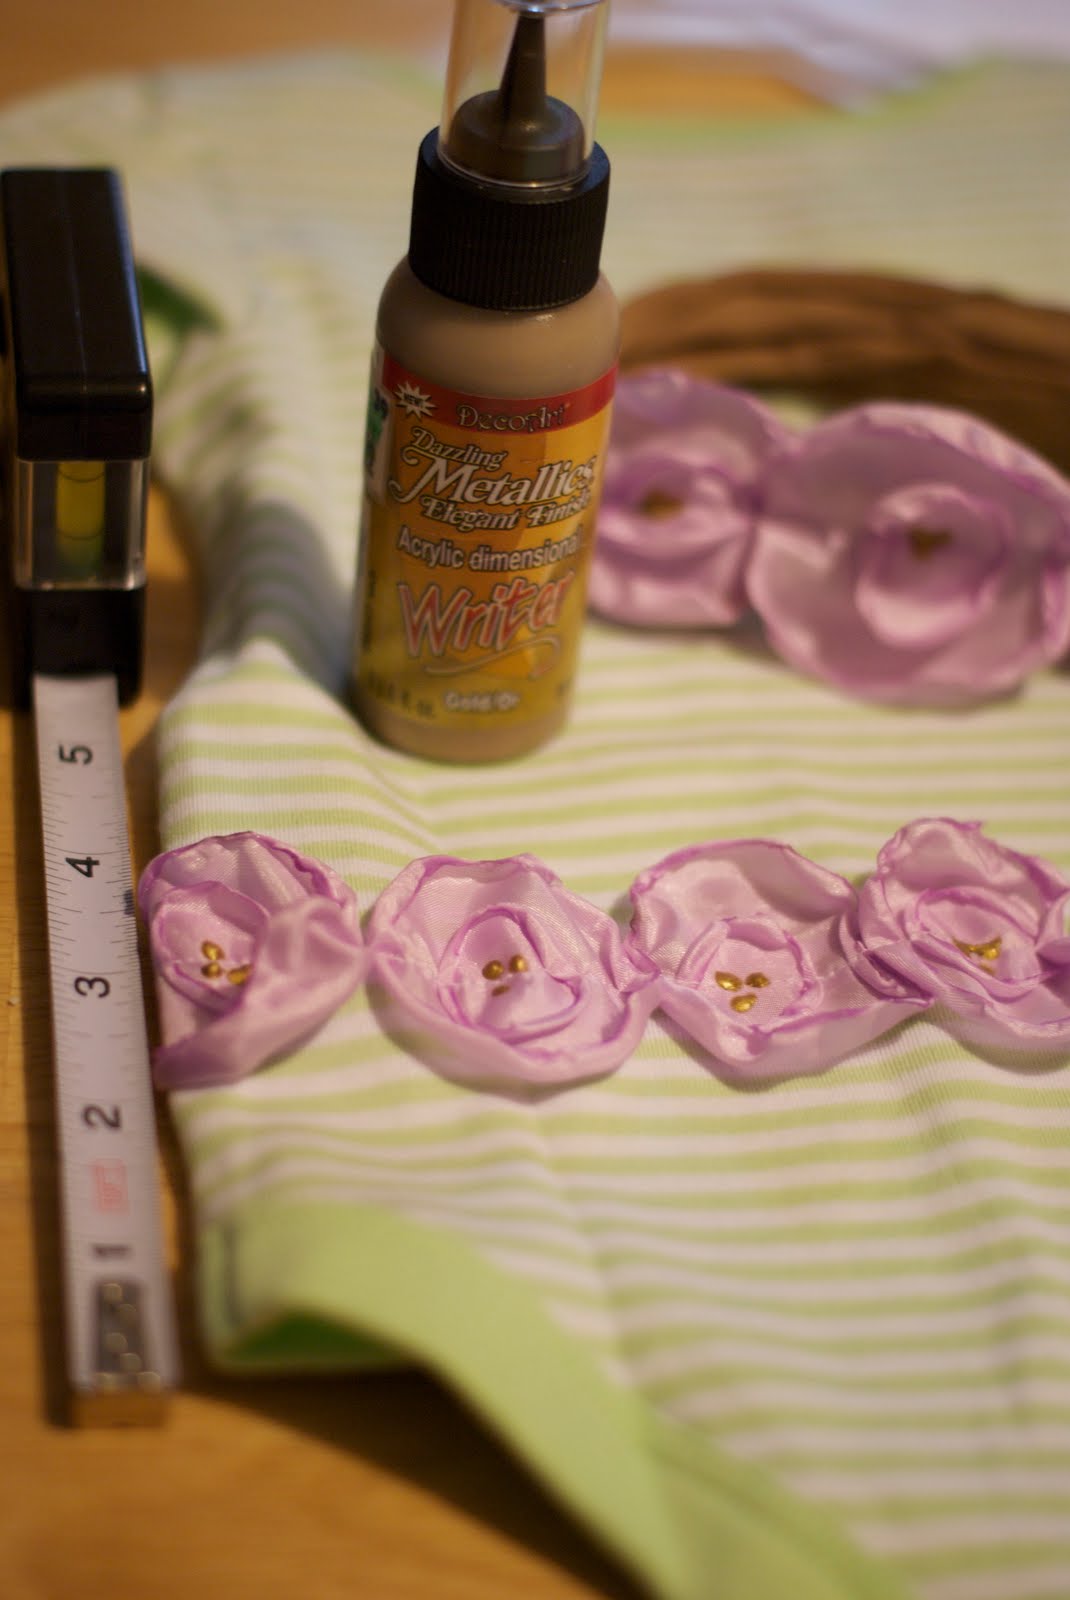
5. Measure up 3 inches from the edge of the leg on the onesie. Arrange your flowers in a straight line and across the onesie and pin in place. I chose to use only large and small petals at this point. Gradually move them through your machine, being careful to pull the pins out before sewing & make sure the petals are laying flat as you continue sewing in a straight line. Backstitch at the beginning and end of your line of flowers to secure them in place. (You could hand sew these if you are uncomfortable with a machine. Just be sure to secure your flowers in place). The sizes of the flowers can vary some, so don't worry if your circles are imperfect. These imperfections give it more personality. I used 7 flowers across the length of the onesie.


7. Let it dry & celebrate again because your project is finished! You've got a super cute flower-ruffle onesie on your hands! Enjoy watching your little girl or your friend's little girl waddle or crawl in this sweet little outfit!
-Mandy