
Showing posts with label paint. Show all posts

Thursday, August 11, 2011

Laundry Room Art on the (REALLY) Cheap

Summer break is winding down, and I've been very busy. Thanks to a record setting string of high temperatures in Oklahoma,  I've also been very broke. What's the phrase? Necessity is the mother of invention? That was definitely the case for me today. I have been desperate to paint something for my laundry room. I recently re-painted it a light blue hue, and now the finished walls look a little bare. I know it's the LAUNDRY room, and let's be honest - I'm one of the only people that even SEES that room, but I wanted a little something to spruce it up, and make it a happy little place to be (since I SEE it a LOT!)  Inspired by this little lovely I found on etsy.
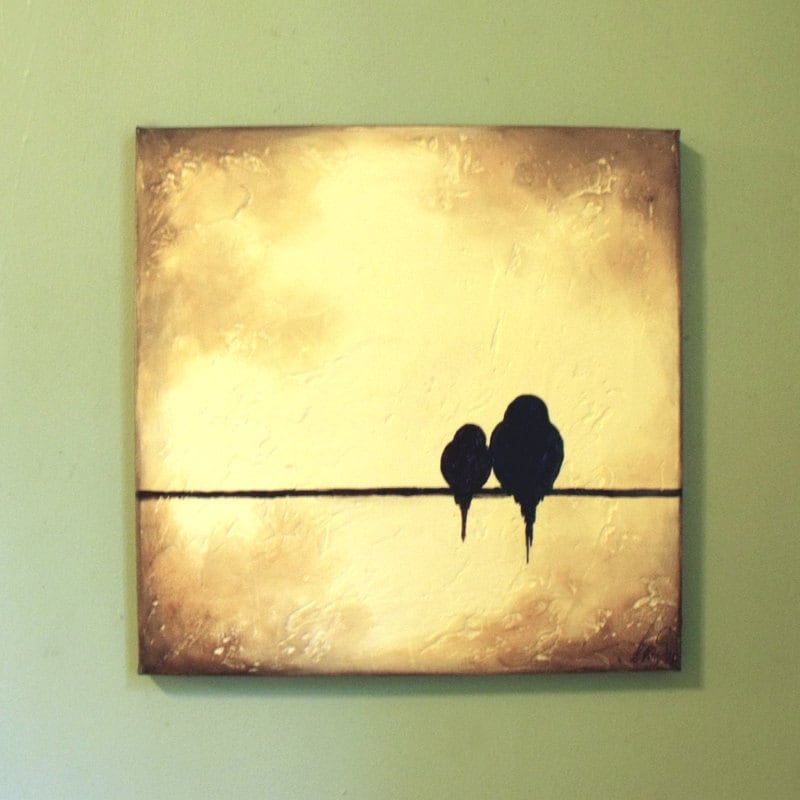

I have no blank canvases in my house, and although they aren't extremely expensive (maybe around $15) for the size I wanted....I can't afford it right now. So, I improvised, with materials I'm sure most of us already have on hand.

It was around 11:00am when I started my project. I had just sat down to do this:


So, naturally...my mind was wandering. Then it hit me! Maybe I could use a simple cardboard box as my canvas. So, I went out to my garage , scouring boxes for the perfect sized "canvas". Bingo! A tomato box from our last produce delivery. Then I covered my table, grabbed my paints and brushes, flipped the box over & and went to town!


I taped over the exposed holes in my canvas.


I painted a primer coat of cream acrylic paint.


Followed by the colors I wanted as my background.


I decided to paint the sides of the box, to appear as a raised canvas, rather than leaving them exposed, or cutting them off, as I'd originally planned.


Next I painted the birds, and in the spirit of clean laundry, and missing socks, I painted a pair - drying from a clothesline. Perfect for a laundry room!


Then, I coated it with a layer of clear gloss spray paint, and hung it on on the wall. The entire process beginning to end took about 2 hours to complete. It's now just after 1:00pm, and it looks like it's time to hit the books again.

I'm thrilled with the results. Cheery laundry room art for about $ .25. (I only paid the price of paint!)


Quick - check your garage and storage areas...what have you got that might make a free canvas?


Monday, June 21, 2010

I Am Loved - Tissue Paper Wall Art

Hello friends!

It's been a while since I last posted, but I've been SO busy. Creating, playing and enjoying my family. I have so many exciting things to share with you and can't wait to get to it. I'll be guest blogging a few places in early July. I'll let you know more about that later, but be ready to visit some great blogs!

For now, I wanted to show you some artwork I created recently for my daughter's room. I've seen some great typography posters lately - with great lines and simple text.  Here's a link to one I like by Persimmon & Pink.I wanted to create the same effect, for a little less mulah, and had the perfect message to share with my littlest one.

It's not perfect, but I kind of love that about it. I did, however learn some lessons (for next time).  I'll share these with you, of course, so that your creations can be a little closer to perfect than mine is.  Please let me know if you attempt something similar. I'd love to see pics!

This was a  REALLY easy project, and took about 20 minutes total. Fabulous!  Better yet, I was able to salvage a piece art board that I had purchased, painted and contemplated tossing.  

Seriously...I just flipped over my artwork, cut it in 1/2 and started again. See the clouds  - Oops!

 Aahh  <--- Much better

I used a frame from some artwork that was in our our garage sale pile. These reused items along with acrylic paint, mod podge and tissue paper brought this project to a grand total less than $1.00. That's a price I can handle!

So....are you ready to make your own? Here we go!

1. Use some kind of paper/board that will accept watercolor or acrylic paint. I used some matting board that I found on sale at Hobby Lobby. It was textured & resembled thick watercolor paper.  As I mentioned before, this was from a previous painting project gone wrong.You can see some of the imperfections around the corners of the "canvas" from my previous project.  Be resourceful! Use what you've got!

I diluted my acrylic paint with water and painted, graduating the color as I went from one side to the other. I did one layer than let it dry & repeated it again - making sure the color was concentrated on one side.

2. Gather your supplies. I used tissue paper that I had on hand for wrapping. Just figure out how big you want your letters to be and cut the paper into squares. I held mine together in a stack so that every square was the same size.

If I were doing this project again, I'd cut double or triple layers of each color, so that while I was making each letter I could layer it onto the paper. A few of mine ripped while I was mod-podging and this would have solved that problem.

Figure out what you want your picture to say & count the letters in your words. Make sure you have enough paper for each letter.

3. Lay out the paper on the board the way you think you would like for it to appear. It took me a while to choose which colors to place next to one-another. This might be easier if you purchased tissue paper specifically for the project, but if you're using what you have, please don't skip this step!

4. Trace the letters in pencil onto your tissue squares, keeping the dimensions of the square to make letter-size consistent.

5. Cut out your letters and lay them on the board where you want to place them.

6. Mod podge the canvas, CAREFULLY place the letter down (use layers if possible). Gently apply mod-podge over each letter, smoothing out as you go.

I used a glossy mod-podge because it's what I had, but I think a matte would look much cleaner.

7.  Let it dry, then stand back & admire! Impatient as always, I helped mine dry with a hair-dryer. ;)

You can frame it, or not. I did, and now it is a cheery (slightly imperfect) and wonderful addition to my little one's room.